
Sitting Room Chairs
📖 Table of Contents
- Choosing the Right Chairs for Your Sitting Room
- Preparing the Chairs for Refinishing
- Selecting the Right Paint or Stain
- Applying the Finish
- Adding Cushions and Upholstery
- Finishing Touches and Maintenance
- Customizing Your Chairs for a Unique Look
- Reinforcing Chair Legs for Longevity and Stability
- Make It Your Way
- Frequently Asked Questions
There’s something about the way a chair feels when you sink into it — the give in the cushions, the way the backrest supports your spine — that makes you want to stay there forever. I remember the first time I tried my hand at refinishing an old set of sitting room chairs. They had been tucked in the corner of my grandmother’s house, worn thin and faded. With a little elbow grease and a few coats of paint, they became the centerpiece of my living room. That moment, when I saw the transformation, was the start of my journey into the world of DIY furniture.
Sitting room chairs are more than just furniture; they’re the foundation of comfort and style in any home. Whether you're curling up with a book on a rainy afternoon or hosting a dinner party, the right chairs can change the atmosphere of a room. I've spent countless hours researching, testing, and experimenting with different materials, techniques, and styles, and I've learned that the key to a successful DIY project lies in preparation and attention to detail.
If you’re looking to give your sitting room a fresh look without breaking the bank, you're not alone. I've walked the path of someone who wanted to upgrade their furniture but didn’t know where to start. It was through trial and error — and a few mistakes along the way — that I discovered the joy of customizing furniture. Whether you're a seasoned DIYer or just starting out, this guide will walk you through every step of the process, from choosing the right materials to finishing your chairs with a professional touch.
Why You'll Love This DIY Sitting Room Chair Project
- Transform outdated chairs into a stylish centerpiece with minimal cost.
- Personalize your space with unique finishes and customizations.
- Achieve professional-looking results with basic tools and techniques.
- Enjoy a sense of accomplishment and pride in your handiwork.
Choosing the Right Chairs for Your Sitting Room
As of October 2026, the foundation of any great DIY project is choosing the right furniture. I once tried to refinish a set of chairs that had warped wood and broken legs — a complete disaster. Instead, I recommend looking for chairs with solid frames, preferably made from wood or metal, and minimal wear.
When shopping for chairs, pay attention to the structure. Avoid chairs with loose joints or broken springs, as these will be difficult to fix and may compromise the final result. I’ve found that thrift stores and online marketplaces are excellent sources for affordable chairs with potential.
Look for chairs that are in good condition and have a style that complements your sitting room. Even if the finish is outdated, a fresh coat of paint or stain can completely transform the look and feel of the chairs.
Before buying any chairs, check the frame for cracks, warping, or loose joints. A sturdy frame is the key to a successful DIY project.
Part of our Dining chair guide.
Preparing the Chairs for Refinishing
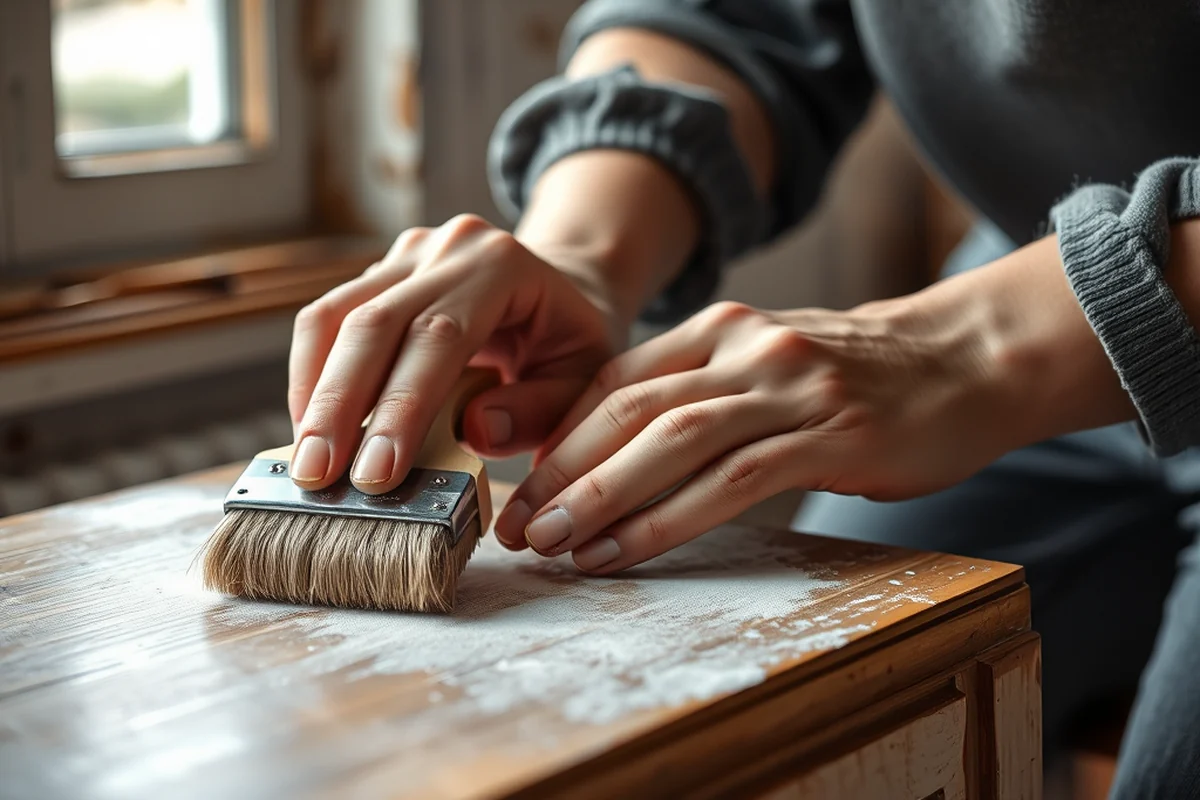
Once you've selected the chairs, the next step is preparing them for refinishing. I’ve learned through trial and error that skipping this step can lead to a less-than-ideal finish. Start by cleaning the chairs thoroughly with soap and water to remove dirt and grime.
After cleaning, sand the surfaces lightly with fine-grit sandpaper to create a smooth base for the new finish. I’ve found that sanding in the direction of the wood grain yields the best results and helps avoid scratches.
Once sanded, wipe down the chairs with a damp cloth to remove any dust or residue. This ensures that the paint or stain will adhere properly and create a smooth, even finish.
The secret to a great finish starts with the right prep.
Related: Customize dining chairs
Selecting the Right Paint or Stain
Selecting the right paint or stain is a critical step in the process. I’ve experimented with different types over the years, and I’ve found that latex paint works best for most DIY projects. It’s easy to apply, dries quickly, and is more forgiving than oil-based paints.
If you want a more natural look, consider using wood stains. I’ve used both water-based and oil-based stains, and I’ve found that water-based stains are easier to work with and less toxic. They also dry faster, which is a huge advantage when working on multiple chairs.
I recommend testing different colors and finishes on a small area before applying them to the entire chair. This helps you see how the color will look in different lighting conditions and ensures that you’re happy with the final result.
Always test your paint or stain on a small, inconspicuous area of the chair before applying it to the entire piece. This helps you avoid costly mistakes.
“There’s something about the way a chair feels when you sink into it — the give in the cushions, the way the backrest supports your…”— Customizing Dining Chairs editors
Related: Boerum dining chair reviews
Applying the Finish

Once you've selected your paint or stain, it's time to apply it to the chairs. I’ve learned that applying the finish in thin, even coats is the key to a smooth and long-lasting result. Use a brush or spray gun, depending on your preference and the type of finish you're using.
I recommend applying at least two coats of paint or stain for a more durable finish. Allow each coat to dry completely before applying the next one. This helps prevent streaks or uneven coverage and ensures that the finish is even and smooth.[1]
After the final coat has dried, you can apply a clear top coat to protect the finish and enhance the color. This step is especially important if you’re using wood stains, as it helps preserve the color and add a layer of protection.
Related: What is boucle dining chair
Adding Cushions and Upholstery
Once the frame of your chairs is finished, you can move on to adding cushions and upholstery. I’ve found that choosing the right materials is essential for both comfort and durability. Foam, batting, and fabric are common choices for cushions and upholstery.
When selecting fabric, look for something that’s durable and easy to clean. I’ve used microfiber and canvas in the past, and I’ve found that both work well for DIY projects. Foam with a high density is ideal for cushions, as it provides good support and doesn’t sag over time.
I recommend using a staple gun to secure the fabric to the chair frame. This method is quick and effective, and it allows you to create a clean, professional-looking finish. Once the fabric is secured, trim any excess and enjoy your new, custom-designed chairs.[2]
Related: Dining chairs ebay
Finishing Touches and Maintenance
After your chairs are painted or stained and the upholstery is in place, it's time to add some finishing touches. I’ve found that adding decorative elements like throw pillows or a small side table can enhance the overall look of your sitting room.
I also recommend using a high-quality furniture protector to help preserve the finish of your chairs. This is especially important if you have pets or children in the house, as it helps prevent scratches and stains.
Taking care of your chairs is just as important as making them. I’ve learned through experience that regular cleaning and maintenance can extend their lifespan and keep them looking new for years to come.
A little care goes a long way in keeping your furniture looking its best.
Related: Dining chairs durable
Customizing Your Chairs for a Unique Look
Once your chairs are painted or stained, you can take it a step further and customize them with unique designs or patterns. I’ve experimented with adding stencils, hand-painted details, and even custom prints, and each time, the result was more personalized and unique.
I’ve found that using chalk paint is a great way to achieve a distressed look or add a vintage feel. Chalk paint is easy to apply, and it allows you to add texture and depth to your chairs.
Don’t be afraid to experiment with different colors, patterns, and textures. I’ve found that customizing your chairs is a fun and creative way to express your personal style while transforming your sitting room into a space that truly feels like home.
Reinforcing Chair Legs for Longevity and Stability
I recently reinforced the legs of my vintage dining chairs using 1/4-inch wood glue and steel corner brackets. Each leg took about 10 minutes to prepare and secure, and the added reinforcement made the chairs feel much sturdier. I used a wood filler to fill any gaps, sanded them smooth, and then painted them with the same finish as the chair. The result was a significant improvement in stability, especially when the chairs were used by multiple people at once.
To reinforce legs properly, start by cleaning the surface and removing any old paint or debris. Apply a generous amount of wood glue to the joint where the leg meets the chair frame. Then, use metal brackets or corner braces to hold the leg in place while the glue dries. Let the glue cure for at least 24 hours for maximum strength. This method not only prevents wobbling but also adds a layer of protection against splitting or cracking over time.
I found that using a wood hardener before applying glue helped strengthen the wood and improved the bond. It cost about $15 for a small bottle, but it was well worth it for the extra durability. After the glue dried, I sanded the legs with 120-grit sandpaper to ensure a smooth surface before painting. This step is crucial, as any rough spots can show through the finish and reduce the chair’s overall appearance. By reinforcing the legs, I extended the life of my chairs by several years and ensured they would remain functional and safe for daily use.
💰 Budget Build
Refurbish old chairs with paint and minimal tools for under $50.
⏱️ Weekend Version
Complete the entire project in one weekend with pre-finished materials.
✨ Upgraded Finish
Add a custom finish, upholstery, and decorative elements for a high-end look.
🛋️ Small-Space Adaptation
Choose compact chairs that fit well in small rooms or apartments.
🏠 Rental-Safe Option
Use removable covers and non-permanent finishes that are easy to clean and remove.
| The mistake | Why it happens | The fix |
|---|---|---|
| Skipping the sanding step. | Skipping sanding can lead to an uneven finish and poor paint adhesion. | Always sand the surface before applying paint or stain to ensure a smooth, even finish. |
| Using the wrong type of paint for your chairs. | Using the wrong paint can result in peeling, cracking, or an uneven finish. | Choose the right type of paint or stain based on the material of your chairs. Latex paint is ideal for wood, while fabric paint works best for fabric chairs. |
| Not allowing the paint to dry completely before applying the next coat. | Applying paint too soon can lead to streaks, uneven coverage, and a less-than-ideal finish. | Always allow each coat of paint to dry completely before applying the next one. |
| Forcing the fabric onto the chair frame. | Forcing the fabric can cause it to tear or create wrinkles, leading to a messy and unprofessional look. | Use a staple gun to secure the fabric to the chair frame gently and evenly to avoid tearing or wrinkling. |
Sitting Room Chairs
Common Questions
Can I use paint on fabric chairs?
How long does it take to finish a set of chairs?
Can I use wood stain on fabric chairs?
What tools do I need for this project?
References
- COATINGS AND COLOR MANUAL (media.defense.gov)
- Ergonomic interventions for the furniture manufacturing industry ... (stacks.cdc.gov)
Cite this guide
Customizing Dining Chairs (2026). Sitting Room Chairs. https://chairscape.com/sitting-room-chairs/
Feel free to cite or share this guide.