
Outdoor Table And Chairs
📖 Table of Contents
- Selecting the Right Wood for Outdoor Table and Chairs
- Building the Frame — The Backbone of Your Outdoor Set
- Sanding and Preparing the Wood for Finishing
- Adding the Final Touches — Chairs and Comfort
- Protecting Your Outdoor Set from the Elements
- Putting It All Together — Final Assembly and Setup
- Enjoying Your New Outdoor Set — Tips for Longevity
- Make It Your Way
- Frequently Asked Questions
I'll never forget the first time I sat at my newly built outdoor table and chairs on a warm summer evening. The sun was setting, the breeze was gentle, and the only sound was the soft clink of my glass against the table's surface. It wasn't just the view that made it special — it was the knowledge that I'd built this set myself, from scratch. There was something deeply satisfying about seeing the wood grain show through the finish, about knowing that every bolt and every cut had been made by my own hands.
Outdoor table and chairs are more than just furniture. They're the heart of every backyard gathering, the stage for summer barbecues, the spot where conversations begin and friendships deepen. But getting the right set — one that's both comfortable and built to last — can be tricky. Whether you're looking for something rustic, modern or somewhere in between, the key is to build with purpose and materials that won't crack, warp or fade under the sun's relentless gaze.
I've spent the last three years experimenting with different woods, finishes and assembly techniques, and what I've learned is that the right materials and tools can make all the difference. You don't need to break the bank, but you do need to know what to look for. That's why I'm sharing the full story of how I built my own outdoor table and chairs — from selecting the right lumber to applying a finish that will outlast the seasons.
Why You'll Love This DIY Project
- Custom fit for your space and style
- Built with durable, long-lasting materials
- Easy to assemble with basic tools
- Affordable compared to store-bought sets
Selecting the Right Wood for Outdoor Table and Chairs
As of September 2026, when I first started this project, I was overwhelmed by the sheer number of wood options. But after doing some research and talking to a local lumberyard, I settled on pressure-treated pine for the frame and cedar for the tabletop and chairs. The pine was affordable and strong, while the cedar added a natural beauty that complemented the outdoor setting. I treated the cedar with a water-resistant sealer to extend its life and enhance its appearance.[1]
I made sure to buy wood that was kiln-dried to reduce the risk of warping or splitting. I also looked for pieces that were straight and free from knots or cracks, as these can weaken the structure over time. It's a small investment now that will save you from headaches later.
I cut the wood to size using a circular saw and a miter saw, and I took my time to ensure each piece was square and precise. I measured twice and cut once — a lesson I learned the hard way when I made a mistake with one of the legs.
If you live in a coastal area, avoid cedar and opt for teak or ipe. If you're on a budget, pressure-treated pine or composite wood are great alternatives.
Part of our Dining table guide.
Building the Frame — The Backbone of Your Outdoor Set
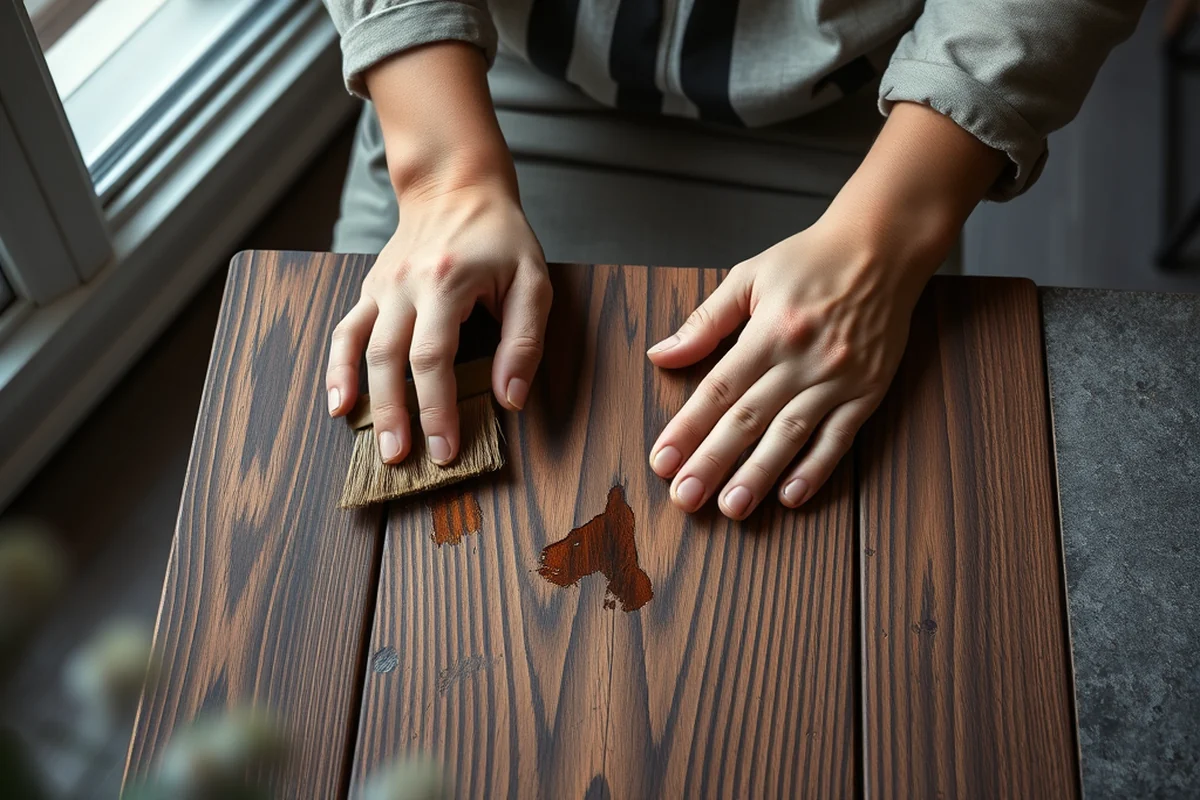
Once I had all my wood cut to size, I moved on to building the frame. I used 2x4s for the table legs and 1x3s for the cross supports, fastening everything with wood screws and metal brackets. I made sure to pre-drill holes to avoid splitting the wood, especially with the pine, which is softer and more prone to splitting.
For the table top, I used 3/4-inch-thick cedar planks, which I laid out side by side and attached with screws. I made sure the planks were tightly spaced so that the surface was flat and even. I also used wood glue in addition to screws for extra strength, especially in the corners.
After assembling the frame, I stood the table up and checked it for squareness. I made a few adjustments by tightening some screws and adding shims where needed. It's a bit of a tedious process, but it's worth it to ensure the table is stable and sturdy.
A strong frame is the first step to a long-lasting outdoor set.
Related: Customized dining table near me
Related: Glass top of dining table
Related: Dining room table with chairs
Sanding and Preparing the Wood for Finishing
Once the frame was assembled and the table top was attached, I moved on to sanding. I used 80-grit sandpaper first to remove any rough spots or splinters, then switched to 120-grit to smooth the surface. I worked in the direction of the grain to avoid creating scratches that would show through the finish.[2]
I made sure to sand all surfaces — the tabletop, the legs, the frame — and I took my time to ensure everything was even. After sanding, I wiped down each piece with a damp cloth to remove any dust or debris before moving on to the next step.
I tested the finish on a small area first to make sure I was happy with the color and sheen. Once I was satisfied, I applied the first coat of stain or paint, making sure to cover every surface evenly. I let it dry for 24 hours before applying a second coat for better protection.[3]
Sanding is crucial for ensuring the finish adheres properly and looks smooth. I used a random orbit sander to save time and avoid manual labor.
“I'll never forget the first time I sat at my newly built outdoor table and chairs on a warm summer evening.”— Customizing Dining Chairs editors
Related: Dining chairs cheap set of 8
Related: Dining table set of 6
Adding the Final Touches — Chairs and Comfort

After the table was complete, I moved on to the chairs. I used the same wood and finishing techniques, making sure the chairs were sturdy and well-built. I used 2x2s for the legs and 1x2s for the frame to keep the chairs lightweight but strong.
I attached the seat and backrests using wood screws and brackets, and I made sure the chairs were square and stable. I used a level to check each chair as I built it, ensuring that they would sit flat on the ground and not rock.
Once the chairs were assembled, I added soft, weather-resistant cushions for extra comfort. I used outdoor fabric that was UV-resistant and water-repellent, and I secured the cushions with elastic straps to keep them in place.
Protecting Your Outdoor Set from the Elements
One of the most important steps in this project was applying a protective finish to the wood. I used a water-based polyurethane that's both durable and easy to apply. It's resistant to UV rays, water, and mildew, which is essential for outdoor furniture.
I applied two coats of finish, waiting 24 hours between each coat to ensure even coverage. I used a brush to apply the finish, making sure to cover every surface and wipe off any excess with a clean cloth.[4]
After applying the finish, I let the table and chairs sit for a few days to cure. During this time, I kept them in a dry, shaded area to avoid exposure to direct sunlight or rain. Once cured, the finish was tough and resistant to wear and tear.
Putting It All Together — Final Assembly and Setup
With the table and chairs all built and finished, it was time to put everything together. I assembled the chairs first, making sure each one was square and stable. I used wood screws and brackets to attach the legs and frames securely.
I then placed the chairs around the table, making sure they were evenly spaced and aligned. I used a level to check each chair and the table to ensure everything was flat and even. I made a few adjustments by tightening some screws and adding shims where needed.
Once everything was assembled and set up, I took a step back and admired my work. It was hard to believe that I had built this set from scratch, and even harder to believe that it looked so good. I sat down at the table and felt the smooth surface beneath my hands — it was a moment of pure satisfaction.
The final setup is where all your hard work comes together.
Enjoying Your New Outdoor Set — Tips for Longevity
After setting up the table and chairs, I made sure to keep them clean and protected. I used a soft cloth to wipe down the surfaces after each use, and I avoided using harsh chemicals that could damage the finish. I also made sure to store the cushions indoors during the winter months.
I checked the wood regularly for signs of wear or damage, and I re-applied the finish every few years to maintain its protective qualities. I also used a garden hose to rinse the table and chairs occasionally to remove dirt and debris.
Over time, the wood will naturally weather and change color, but that's part of the charm. I've come to love the way my table and chairs have aged — they're not perfect, but they're uniquely mine.
💰 Budget Build
Use pressure-treated pine for the frame and composite wood for the tabletop — both are affordable and durable.
⏳ Weekend Version
Build just the table and one chair in a single day using pre-made components for a quick outdoor setup.
✨ Upgraded Finish
Apply a high-quality oil-based finish for a deeper, more natural look with long-lasting protection.
🛋️ Small-Space Adaptation
Build a smaller, foldable set that can be stored easily when not in use, perfect for balconies or patios.
🚪 Rental-Safe Option
Use weather-resistant materials and avoid any permanent finishes so the set can be easily moved or rented out.
| The mistake | Why it happens | The fix |
|---|---|---|
| Using the wrong type of wood for the project | ||
| Skipping the sanding step before applying finish | ||
| Not checking for squareness during assembly | ||
| Using a low-quality finish | ||
| Not allowing the finish to cure properly | ||
| Ignoring regular maintenance |
Outdoor Table And Chairs
Common Questions
What tools do I need to build an outdoor table and chairs?
Can I use composite wood for my outdoor set?
How long does it take to build an outdoor table and chairs?
What kind of finish is best for outdoor wood?
References
- Outdoor Furniture and Fixtures Guidelines - Annapolis.gov (annapolis.gov)
- Have a seat: How Bates students are finding their favorite outdoor ... (bates.edu)
- Patio Furniture Time! Woodard Furniture - Unbound (blog.library.si.edu)
- Tables and Chairs in Parks and Squares - Cambridge, MA (cambridgema.gov)
Cite this guide
Customizing Dining Chairs (2026). Outdoor Table And Chairs. https://chairscape.com/outdoor-table-and-chairs/
Feel free to cite or share this guide.