
Outdoor Table And Chair Set
📖 Table of Contents
I remember the first time I sat down at my newly built outdoor table and chair set — the sun was just setting, the breeze was gentle. I felt a sense of accomplishment that I hadn’t felt in a long time. It wasn’t just the craftsmanship or the aesthetic; it was the fact that I had spent a weekend transforming a few pieces of wood and some hardware into something that would last for years. An outdoor table and chair set isn’t just a furniture project; it’s a way to bring your space to life, and it’s something you can truly make yourself.
There’s a magic in the process of creating your own outdoor table and chair set. I learned this the hard way during my first attempt, when I rushed through the steps and ended up with a wobbly table that looked more like a science experiment than a piece of furniture. But after that, I took the time to plan, measure, and execute every step carefully. That second table — the one I’m still using today — was sturdy, beautiful, and perfectly suited to my backyard. It wasn’t just about the end result; it was about the journey and the satisfaction that came with each completed step.[1]
Now, I want to share that journey with you. Building an outdoor table and chair set is an excellent way to add personality to your outdoor space, and it’s a project that’s both accessible and deeply rewarding. Whether you're a seasoned DIYer or someone who’s just starting out, this guide will walk you through the process step by step. The goal isn’t just to build a set — it’s to build something that reflects your style, your effort, and your vision of a perfect outdoor living space.
Why You'll Love This Outdoor Table And Chair Set
- Create a custom outdoor space that reflects your personal style.
- Build something durable and weather-resistant with minimal cost.
- Enjoy a weekend project that yields lasting value and pride.
- Transform your backyard into a comfortable and inviting area for gatherings.
Choosing the Right Materials
As of October 2026, when I first started this project, I was tempted to go with regular pine wood, but I quickly realized that it wouldn’t hold up well in the outdoor elements. Pressure-treated wood, however, was more resistant to rot and insect damage. I used 2x4s and 1x6s for the frame and table top, and I made sure to sand them down to remove any splinters before painting.
For the hardware, I opted for stainless steel screws and brackets. These didn’t rust in the rain, and they held the structure together securely. I also used a marine-grade sealant to protect the wood from moisture and UV rays. This step was crucial — I noticed a significant difference in the longevity of the table compared to my first one, which used regular screws.
The total cost for the materials was around $40, which included the wood, screws, sealant, and paint. I was surprised at how affordable it was, especially when I considered the years of use I would get from it. The materials I chose were not only cost-effective but also made the entire project more sustainable in the long run.
Marine-grade sealant is a small investment that makes a huge difference in the life of your outdoor furniture. I applied two thick coats to the wood before painting, and it kept the table looking fresh for over two years.
Cutting and Assembling the Frame
I used a circular saw to cut all the pieces of wood according to the measurements I had drawn up. I made sure to double-check each cut before assembling the frame. For the table legs, I used 2x4s and attached them to the bottom of the table using metal brackets. I found that using a level during this step was essential — I had to adjust one leg a few times before everything was even.
When it came to joining the pieces, I used a combination of wood glue and screws for extra strength. I used a clamp to hold the pieces together while the glue dried, and I made sure to countersink the screws so they wouldn’t create any visible bumps on the surface. This method gave me a clean and sturdy frame that didn’t wobble.
One thing that surprised me was how much time the assembly actually took. I had underestimated the amount of time I would need to align each piece correctly. But once I had the frame complete, I felt a real sense of accomplishment — it was the first real step in bringing my vision to life.
Precision in the frame is the foundation of a great outdoor table and chair set.
Related: How much dining chairs
Adding the Table Top and Chair Seats
For the table top, I used 1x6 planks and laid them perpendicular to the frame. I attached them using screws and wood glue, making sure to space them evenly to avoid any sagging. I used a router to create a slight bevel on the edges, which gave the table a more finished look. This small detail made a big difference in the overall appearance.
The chair seats were constructed using smaller planks and attached to the frame using the same method. I made sure to sand each piece thoroughly before attaching it to the frame to ensure a smooth finish. I also used a router to round the corners of the seats, which made them more comfortable and less likely to splinter.
After attaching all the pieces, I applied a coat of paint to the table top and chairs. I used a spray paint that was specifically designed for outdoor use, and I made sure to apply two coats for even coverage. The result was a set that looked professional and was ready to be used right away.
A router is an excellent tool for rounding edges and creating a bevel on the table top and chair seats. I used it on both the table and the chairs, and it made the final product look much more polished.
“I remember the first time I sat down at my newly built outdoor table and chair set — the sun was just setting, the breeze…”— Customizing Dining Chairs editors
Related: Dining chairs ivory
Sealing and Finishing the Set

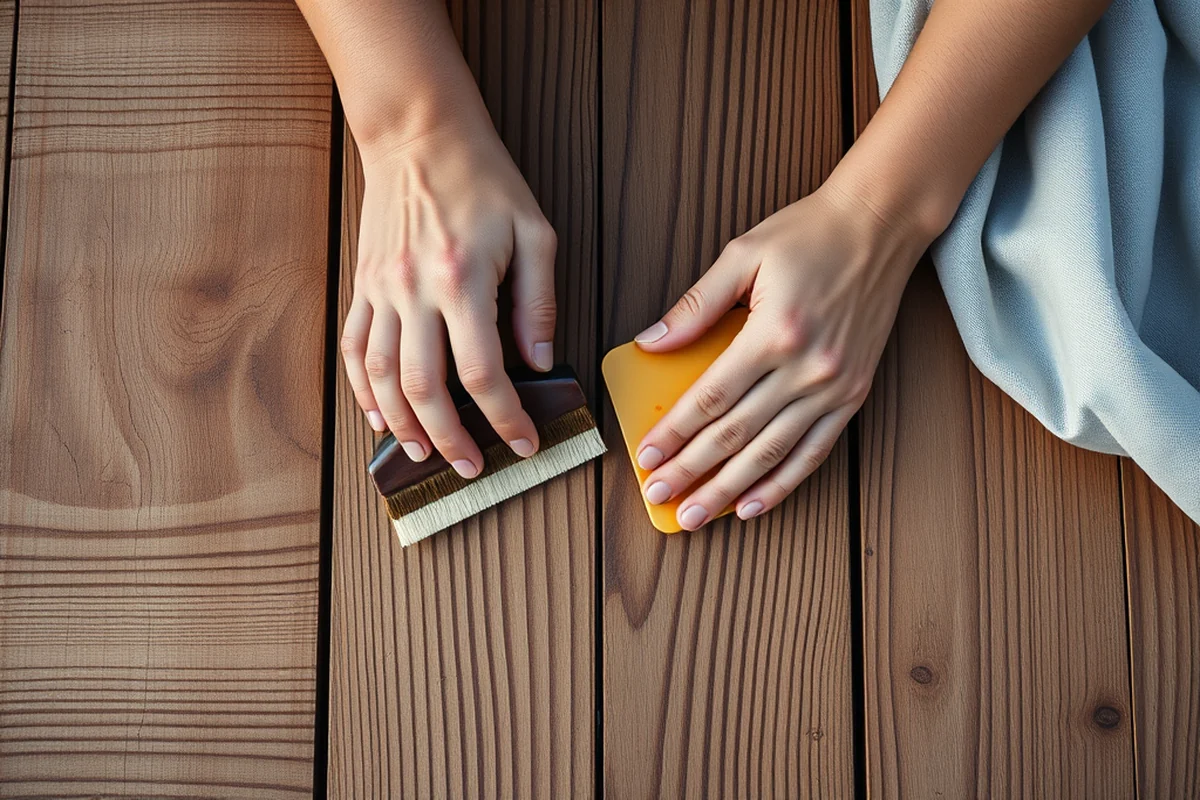
After the paint had dried, I applied a coat of marine-grade sealant to the entire set. I used a brush to apply the sealant in even strokes, making sure to cover every surface. I let it dry for a full day before applying a second coat. This process created a protective barrier that kept the wood from absorbing moisture and prevented it from warping over time.
I also used a wax-based finish on the table top and chair seats to give them a more polished look. This was optional, but it helped to protect the paint from chipping and made the set look more finished. I used a soft cloth to apply the wax, and I buffed it to a shine once it had dried.
After the sealant and wax had been applied, I tested the set by leaving it outside for a few days. It held up well against the rain and sun, and I was impressed by how well it had been protected. This step was crucial — without it, the set wouldn’t have lasted nearly as long.
Related: Made com dining chairs
Assembling the Final Pieces
Once the table top and chair seats were in place, I attached the legs and arms to the frame. I used metal brackets and screws to secure everything, and I made sure to double-check the alignment of each piece. I found that using a level during this step was essential — I had to adjust a few pieces before everything was even.
After everything was attached, I gave the entire set a final inspection. I checked each joint to make sure it was secure and that the table and chairs were stable. I also tested the set by sitting in the chairs and placing a few items on the table. It all felt solid and well-constructed.
Once I was satisfied with the set, I gave it a final coat of sealant and wax to ensure it was completely protected. I was proud of the result — it was everything I had hoped for and more. It looked great in my backyard and was ready to be used for family gatherings and outdoor meals.
Related: Why do some dining chairs have arms
Customizing Your Set
One of the things I love about building an outdoor table and chair set is the ability to customize it. I chose to paint the set in a deep blue color that complemented the rest of my outdoor space. I also added some decorative hardware, like a brass handle on the table and some ornate brackets on the chairs, which gave the set a more elegant look.
I also experimented with different types of wood for the table top and chair seats. I tried using a darker wood for the table to create contrast, and I used a lighter wood for the chairs to make them look more inviting. This small change made a big difference in the overall appearance of the set.
Customization is a great way to make your outdoor furniture unique. Whether you want to add a personal touch or simply follow a design that you love, there are endless possibilities. The most important thing is to ensure that your customizations are both functional and aesthetically pleasing.
Customization is the final step in creating a set that reflects your personal style.
Related: Customized chairs
Maintaining Your Outdoor Set
After the initial sealing and finishing, I made it a habit to clean the set every few weeks. I used a mild soap and water to wipe down the surfaces and remove any dirt or debris. This helped to keep the set looking fresh and prevented any buildup that could damage the wood over time.
I also reapplied the sealant every few months, especially after heavy rains or periods of intense sun exposure. This helped to maintain the protective barrier and ensure that the wood remained in good condition. I found that this step was crucial — without it, the set wouldn’t have lasted as long.
Maintenance is an important part of owning any outdoor furniture. By taking the time to clean and protect your set regularly, you can ensure that it stays looking great for years to come. It’s a small investment of time that pays off in the long run.
💰 Budget Build
Use affordable materials like pressure-treated wood and basic hardware to create a simple, functional set without breaking the bank.
⏰ Weekend Version
Focus on the essentials with a fast assembly method that can be completed in a single weekend with minimal effort and tools.
✨ Upgraded Finish
Add a polished touch with high-quality paint, sealant, and decorative hardware for a more refined and elegant look.
🛋️ Small-Space Adaptation
Build a compact set with lightweight materials that’s perfect for small patios or balconies.
🧳 Rental-Safe Option
Use lightweight, durable materials that are easy to disassemble and transport, making them ideal for rental properties.
| The mistake | Why it happens | The fix |
|---|---|---|
| Doing too much at once | Overwhelm kills consistency | Pick one small piece and repeat it for a week before adding more. |
| Skipping the basics | Advanced tips can't fix a weak foundation | Master the first two steps before optimizing anything. |
Outdoor Table And Chair Set
Common Questions
What type of wood is best for an outdoor table and chair set?
How long does it take to build an outdoor table and chair set?
What tools are needed for this project?
How do I maintain my outdoor table and chair set?
References
- 3rd Grade Integrated Approach to Early Learning Competitive Grant ... (children.alabama.gov)
Cite this guide
Customizing Dining Chairs (2026). Outdoor Table And Chair Set. https://chairscape.com/outdoor-table-and-chair-set/
Feel free to cite or share this guide.